homemade digital picture frame
Step 0: the plan
After I saw Calum's frame, I knew I had to have one of my own. Not only that, but it had to be better. It had to be colour, it had to be network connected, it had to be wireless. I had the hardware: my old AST Ascentia J30 laptop was to be transformed, especially since I had my sister's laptop to use while she was travelling for about a year. The AST has the following pertinent specs:
- Pentium 100 and 16MB RAM, more than enough horsepower
- No CD-ROM drive, since we were going to be network connected we save the space
- 800x600 DSTN screen. The bad thing being that this screen is edgelit, instead of backlit. Boo.
- Only 8-bit colour was available, but that's better than mono.
Step 1: Software
The first step was to get software together that would view images in such a manner, with all of the features that I wanted. This was initially going to be a DOS boot disk that would:
- Load memory manager (HIMEM.SYS)
- Create RAM disk (if necessary)
- Expand files to RAM disk (if necessary)
- Load network card drivers (NDIS) for my Proxim RangeLAN2
- Load MS TCP/IP stack for DOS
- Use NET.EXE MS Networking client to map network drive containing photos
- Launch graphic viewer in slideshow mode
My next idea was to use Linux. Using this would solve all my driver issues instantly, since I had previously set up a Linux box with RangeLAN2 support. And I could use SVGALib for graphics display instead of X Windows, since we only had 16MB of RAM. Genius. I decided to use an older distribution, RedHat Linux 6.2 instead of new stuff because I was most familiar with it and because I didn't need any of the extra fancy crap that the new distribs have. In fact, I intended to strip down the install as much as I could. The steps to setup the Linux system were:
- Install RedHat Linux 6.2 via the network. Do a fairly custom install: no X windows stuff, install Graphics stuff (for SVGAlib and graphic file format libs) and development tools since we'll have to compile some stuff
- Download and setup the Proxim RangeLAN2 driver for Linux
- Download zgv, a great picture viewer for SVGAlib, compile and install
- Make sure Samba was installed, if not install it
- Set up Windows or Samba share on a server where the photo files will stay
- Use smbmount to mount this share on the laptop. Make sure the laptop does this on every boot. This usually means putting a new line in the fstab, but in my case that wouldn't do, because RedHat tries to mount the drives before PCMCIA is started, and therefore before the network interface is live. So I had to put a mount command in the rc.local startup file, which is run after all services are started.
- Get zgv to run on startup. This means adding the following line in /etc/inittab: "7:2345:once:/usr/bin/zgv -l /mnt/photos/*" or something like it
- Reboot the machine, and hopefully everything works.
- Trim the distrib so that only essential services and packages are installed. I left the compilers on just in case.
- Optionally, install a SSH daemon so that you can login remotely and do any system maintenance that may be required (hopefully none)
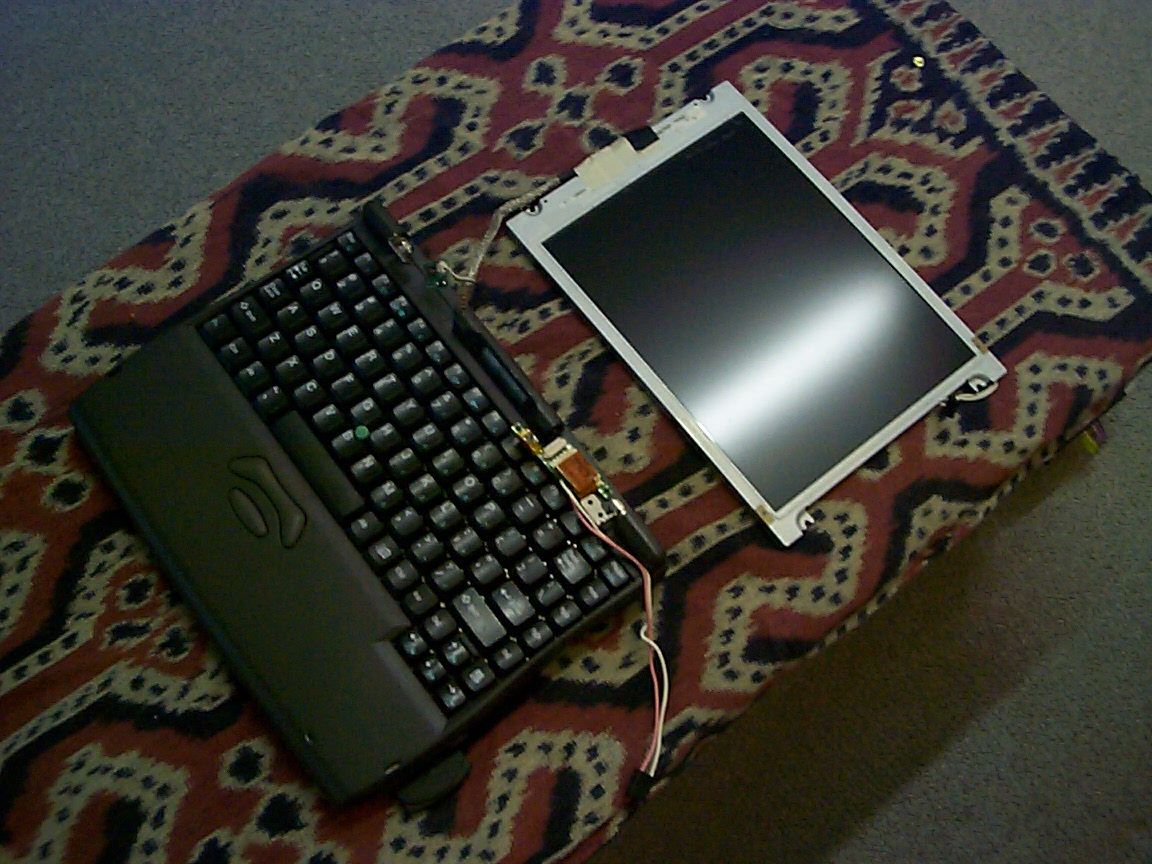
Step 2: Tear apart the darn thing
These photos should pretty much speak for themselves.
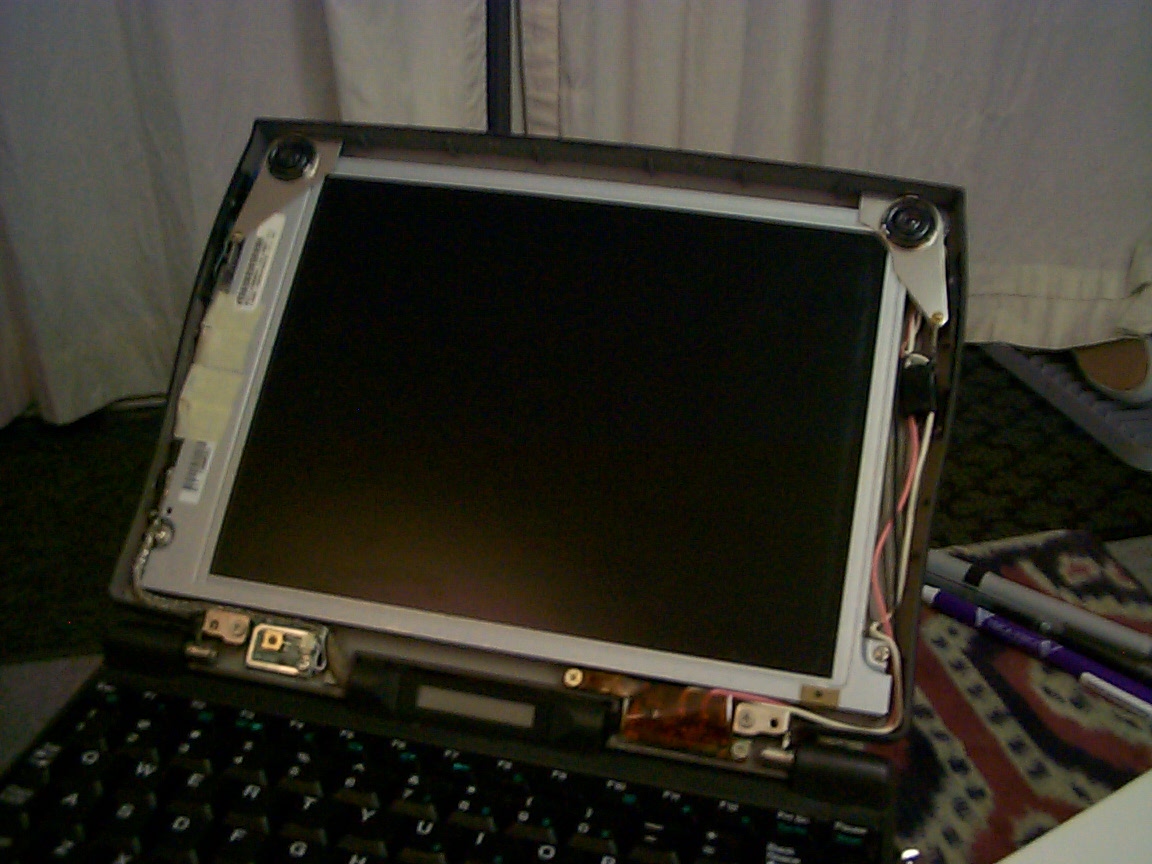 Screen bezel removed: looks pretty easy to take
apart...
Screen bezel removed: looks pretty easy to take
apart...
 Detail of
the lower left corner: note how long the screen cable is! We're in luck!
Detail of
the lower left corner: note how long the screen cable is! We're in luck!
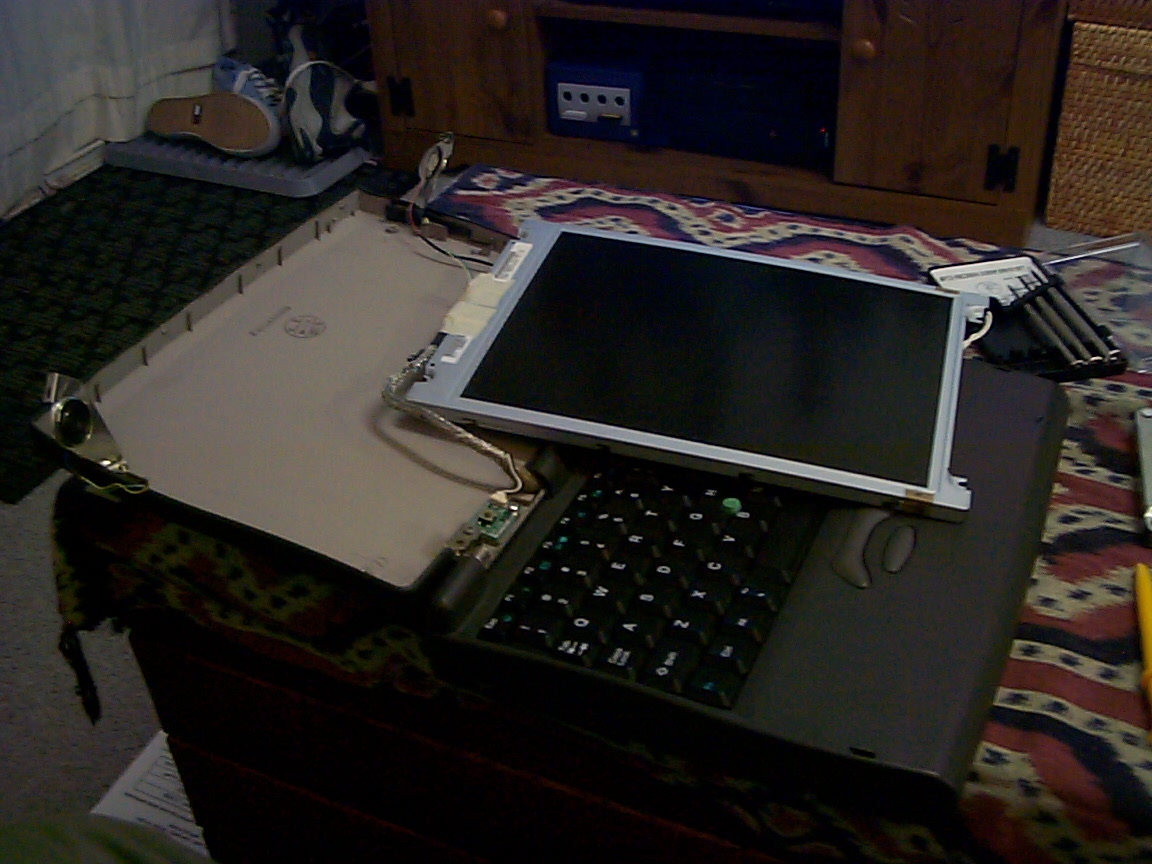 The
screen unmounted from the back bezel. In the corners, the speakers were
mounted on metal corners which were helping to hold the screen in. I
stripped the screws trying to remove them, so I managed to just pry up
their other corner and bend them out of the way. I also had to cut the
speaker wires.
The
screen unmounted from the back bezel. In the corners, the speakers were
mounted on metal corners which were helping to hold the screen in. I
stripped the screws trying to remove them, so I managed to just pry up
their other corner and bend them out of the way. I also had to cut the
speaker wires.
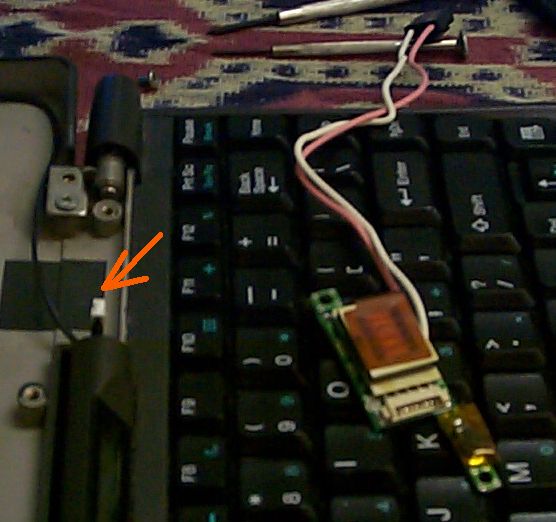 This
little sucker is the power inverter board, that supplies the high voltage
for the screen lights. The arrow points to the connector that it was
plugged into.
This
little sucker is the power inverter board, that supplies the high voltage
for the screen lights. The arrow points to the connector that it was
plugged into.
 The
rear of the screen housing unscrewed. Note the little board with the
power switch on it...
The
rear of the screen housing unscrewed. Note the little board with the
power switch on it...
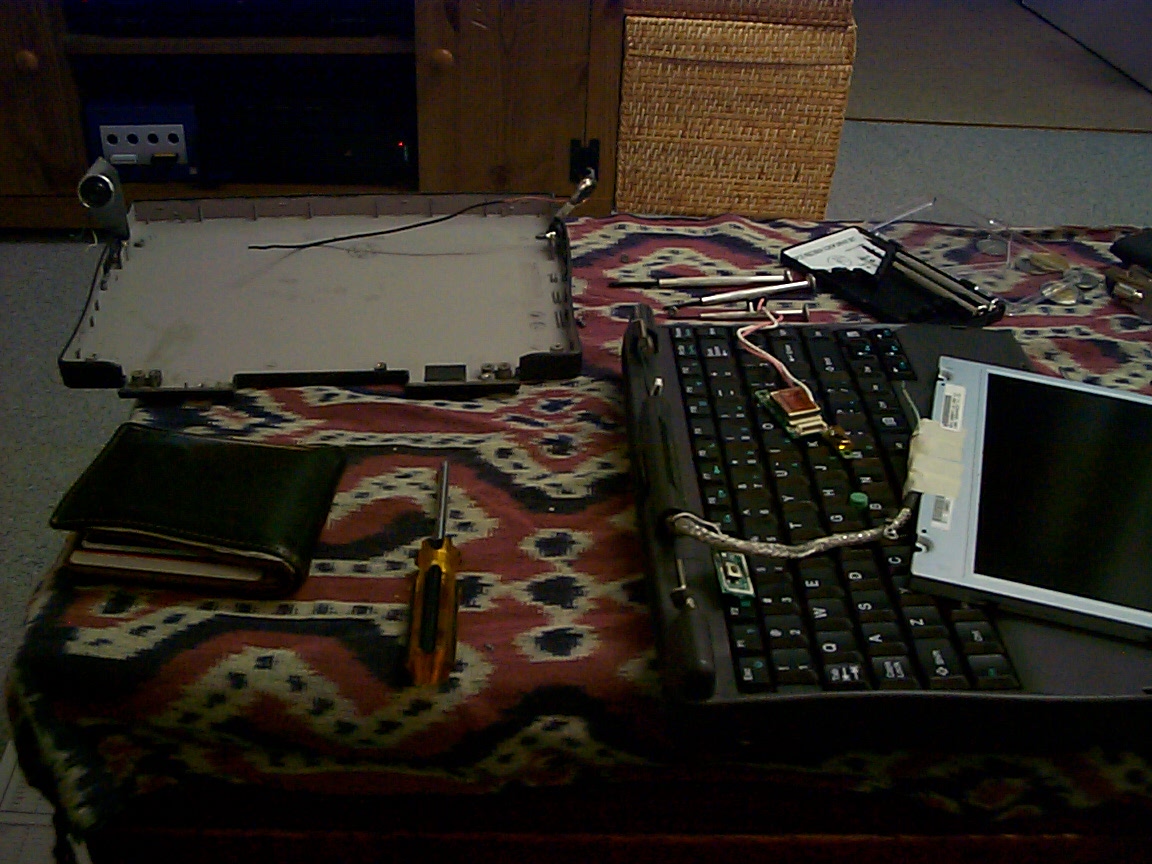
 Everything laid out, ready for the screen to be
taped.
Everything laid out, ready for the screen to be
taped.
 Double-sided
tape in place, ready for LCD to be
mounted. See that white hole just below one of the strips of tape? There
were little plastic bumps there to help the machine align with a docking
station. I had to shave off the bumps with my Dremel in order to make the
back flat enough.
Double-sided
tape in place, ready for LCD to be
mounted. See that white hole just below one of the strips of tape? There
were little plastic bumps there to help the machine align with a docking
station. I had to shave off the bumps with my Dremel in order to make the
back flat enough.
 After all that, it still works! See the power
switch temporarially mounted at the bottom with some double-sided tape.
The power inverter was taped down on the underside with double-sided tape
and then covered with electrical tape - there's 300V going through that
thing, and I don't plan on touching it.
After all that, it still works! See the power
switch temporarially mounted at the bottom with some double-sided tape.
The power inverter was taped down on the underside with double-sided tape
and then covered with electrical tape - there's 300V going through that
thing, and I don't plan on touching it.
Step 3: Make it look purty
I still have to put a nice picture frame around it, matte it, and figure out how to get it to stand up. I'm thinking of looking for one of those tiny easels that people use as photo stands - I think I've seen them in many different sizes before... Oh, and I also have to figure out what to do with the power button. Suspending the laptop doesn't work - the RangeLAN2 driver doesn't like it and the machine always freezes (also happens under Win95). I could extend the power switch wires in order to position it better, but then that would require soldering. Also the video cable has to go under like that, so I'll have to account for it in the stand.